여러 데이터 베이스 사용 시 Transaction
2024. 7. 10. 09:01ㆍSpring Boot
보통 서비스에 @Transactional이라는 어노테이션을 붙여서 오류시 롤백하는 트랙잭션을 구현한다.
다만 보통은 어노테이션만 붙이면 바로 구현이되나
DB를 여러개 연결하여 연결을 직접 설정한 경우에는
TransactionManager를 따로 지정 해 주어야 한다
이번 예제에는 MySQL을 직접 설정한 경우의 예시를 보여주겠다.
package com.example.demo.mySQL;

import javax.sql.DataSource;

import org.springframework.beans.factory.annotation.Qualifier;
import org.springframework.beans.factory.annotation.Value;
import org.springframework.context.annotation.Bean;
import org.springframework.context.annotation.Configuration;
import org.springframework.context.annotation.PropertySource;
import org.springframework.data.jpa.repository.config.EnableJpaRepositories;
import org.springframework.jdbc.core.JdbcTemplate;
import org.springframework.jdbc.datasource.DataSourceTransactionManager;
import org.springframework.jdbc.datasource.DriverManagerDataSource;
import org.springframework.orm.jpa.JpaTransactionManager;
import org.springframework.orm.jpa.LocalContainerEntityManagerFactoryBean;
import org.springframework.orm.jpa.vendor.HibernateJpaVendorAdapter;
import org.springframework.transaction.PlatformTransactionManager;
import org.springframework.transaction.TransactionManager;

import java.util.*;

@EnableJpaRepositories(
    basePackages = "com.example.demo.mySQL",
    entityManagerFactoryRef = "mySQLManagerFactory",
    transactionManagerRef = "mySQLTransactionManager"
)
@Configuration
@PropertySource("classpath:mySQL.properties")
public class mySQLConfig {

    @Value("${url}")
    private String url;

    @Value("${name}")
    private String name;

    @Value("${password}")
    private String password;

    @Bean
    public DataSource mySQLSource() {
        DriverManagerDataSource dataSource = new DriverManagerDataSource();
        dataSource.setDriverClassName("com.mysql.cj.jdbc.Driver");
        dataSource.setUrl(url);
        dataSource.setUsername(name);
        dataSource.setPassword(password);
        return dataSource;
    }

    @Bean
    public LocalContainerEntityManagerFactoryBean mySQLManagerFactory() {
        LocalContainerEntityManagerFactoryBean em = new LocalContainerEntityManagerFactoryBean();
        em.setDataSource(mySQLSource());
        em.setPackagesToScan(new String[] {"com.example.demo.mySQL"});

        HibernateJpaVendorAdapter adapter = new HibernateJpaVendorAdapter();
        adapter.setShowSql(true);
        adapter.setGenerateDdl(true);
        em.setJpaVendorAdapter(adapter);

        HashMap<String, Object> prop = new HashMap<>();
        prop.put("hibernate.dialect", "org.hibernate.dialect.MySQLDialect");
        prop.put("hibernate.hbm2ddl.auto", "update");
        prop.put("hibernate.format_sql", true);
        em.setJpaPropertyMap(prop);

        return em;
    }


    @Bean
    @Qualifier("myTran")
    public PlatformTransactionManager mySQLTransactionManager() {
        JpaTransactionManager manager = new JpaTransactionManager();
        manager.setEntityManagerFactory(mySQLManagerFactory().getObject());
        return manager;
    }

    @Qualifier("myTemplate")
    @Bean
    public JdbcTemplate myTemplate() {
        return new JdbcTemplate(mySQLSource());
    }
}
PlatformTransactionaManager에 @Qualifier를 이용하여 식별자를 추가 해 주었다.
package com.example.demo.mySQL.transaction;

import javax.sql.DataSource;

import org.springframework.data.jpa.repository.JpaRepository;
import org.springframework.stereotype.Repository;

import jakarta.annotation.Resource;

@Repository
public interface tranRepository extends JpaRepository<tranTest, Long> {
}
package com.example.demo.mySQL.transaction;

import org.springframework.beans.factory.annotation.Autowired;
import org.springframework.stereotype.Service;
import org.springframework.transaction.annotation.Transactional;

import lombok.extern.slf4j.Slf4j;

@Slf4j
@Service
public class tranService {

    @Autowired
    tranRepository repo;


    @Transactional(transactionManager = "myTran")
    public void test(String name) {

        repo.save(new tranTest(name));
        if(name.equals("error")) {
            log.info(name);
            throw new RuntimeException("testing");
        }
    }
}
그 후 해당 연결을 이용하는 repository의 service의 method에 @Transactional을 붙이고
transactioanManager에 설정한 식별자를 넣어주었다.
해당 메소드는 이름으로 error가 들어오면 에러를 발생시키는 메소드이다
package com.example.demo.mySQL.transaction;

import org.springframework.beans.factory.annotation.Autowired;
import org.springframework.web.bind.annotation.RequestMapping;
import org.springframework.web.bind.annotation.RestController;

import lombok.extern.slf4j.Slf4j;

import org.springframework.web.bind.annotation.GetMapping;
import org.springframework.web.bind.annotation.RequestParam;

@Slf4j
@RestController
@RequestMapping("/mysql/tran")
public class tranController {
    @Autowired
    tranService service;


    @GetMapping("/test")
    public String getMethodName(@RequestParam String name){
        try {
            service.test(name);
            return name;

        } catch (Exception e){
            return "input is error";
        }

    }

}
간단한 controller를 만들어서 테스트를 해보면


name으로 error를 넘겨줄 시 save함수가 실행 되었으나 rollback되어서 database에 저장이 안 되었음을 알 수 있다.
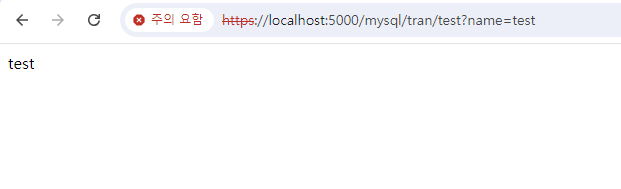
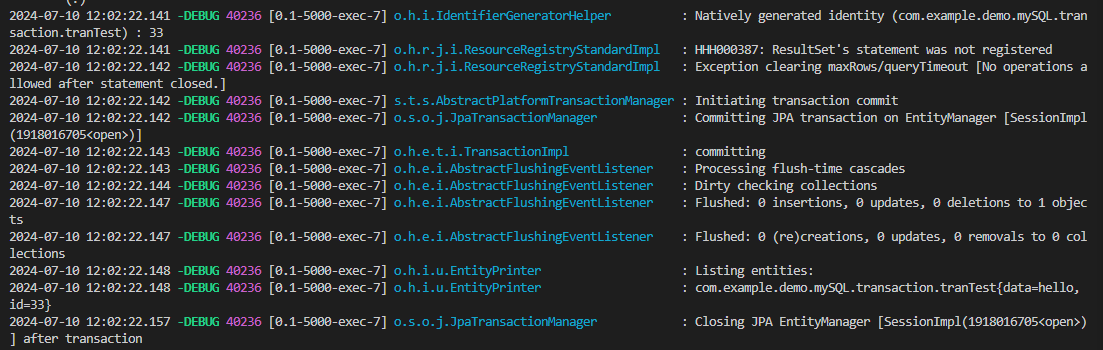

error말고 다른 값을 넣으면 정상적으로 commit되어서 값이 잘 들어감도 확인해 보았다.
'Spring Boot' 카테고리의 다른 글
| Lazy Loading (0) | 2024.07.31 |
|---|---|
| Spring AOP (0) | 2024.07.10 |
| R2DBC (0) | 2024.06.17 |
| Spring WebFlux (0) | 2024.03.18 |
| Spring WebClient (0) | 2024.03.10 |